Mini Roundabout Masterclass
Follow us on Youtube - Books - Online Training
Mini Roundabout Masterclass
Mini roundabouts look simple… and that’s exactly why they catch people out.
Mini Roundabouts Explained (ADI Part 3 Guide – Simple, Clear, Real-World Teaching)
Mini roundabouts look simple—but they are one of the most misunderstood and poorly taught topics in driving lessons.
For ADI Part 3, this is a golden opportunity.
Why? Because mini roundabouts expose whether you’re teaching rules… or teaching understanding.


The Big Rule Change (This is where most trainees go wrong)
The Big Rule Change (This is where most trainees go wrong)
On a normal roundabout, you can teach:
Clock face method
Danger zone (roughly 3 to 7 o’clock)
Structured flow of traffic
On a mini roundabout, that structure breaks down.
Why? Because:
Vehicles can turn before the centre marking
Vehicles can drive over the painted circle
There is no true circular flow
Some drivers treat it like a crossroads
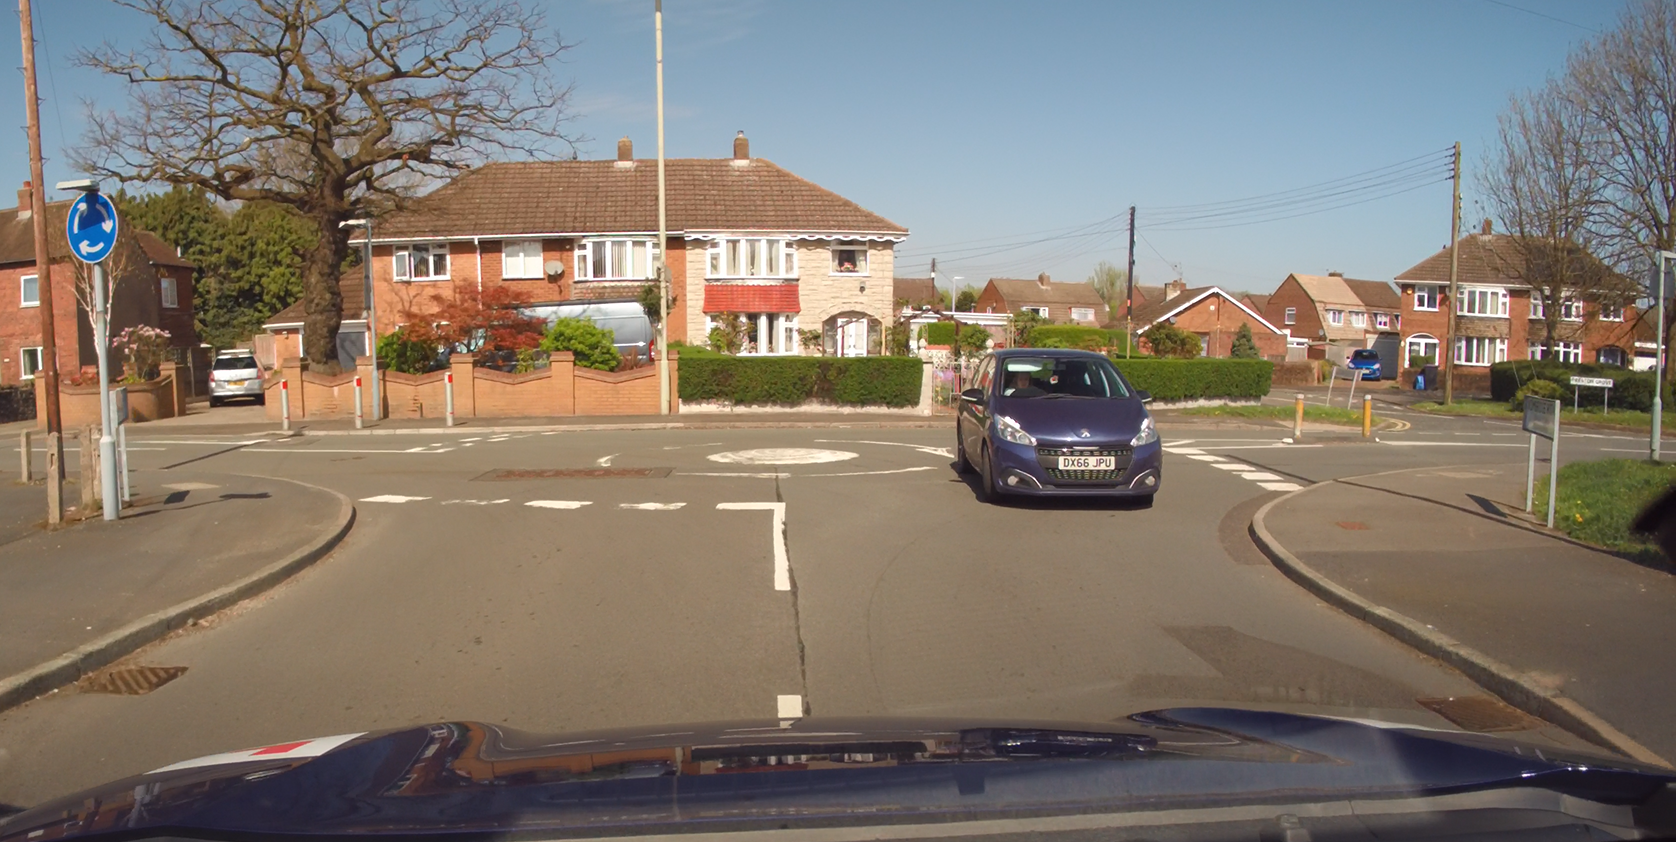
Mini Roundabouts Higher Risk
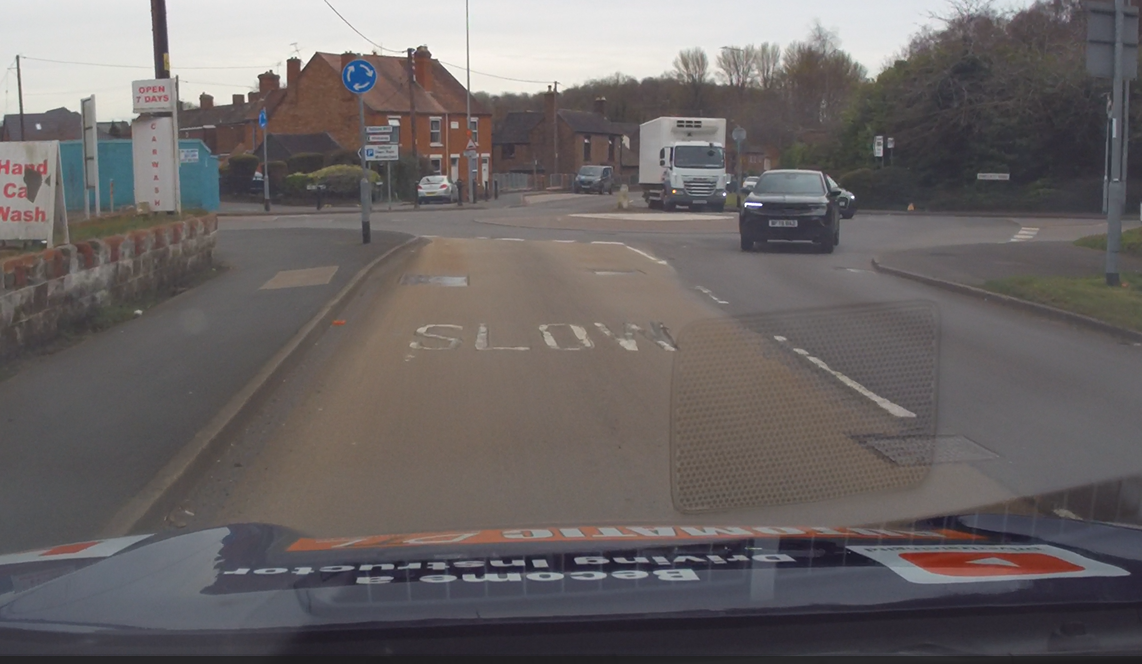
Mini roundabouts carry a higher level of risk because everything happens closer, quicker, and with less predictability.
The reduced size of the junction means approaching traffic is much nearer to you, particularly from the right and directly ahead, so hazards develop earlier and give you far less time to assess and respond.
This creates a situation where decisions have to be made more quickly, often under pressure, and without the benefit of the space and structure you would normally have on a larger roundabout.
On top of that, driver behaviour is far less predictable—vehicles may cut across the centre, change direction late, or fail to follow a clear path altogether.

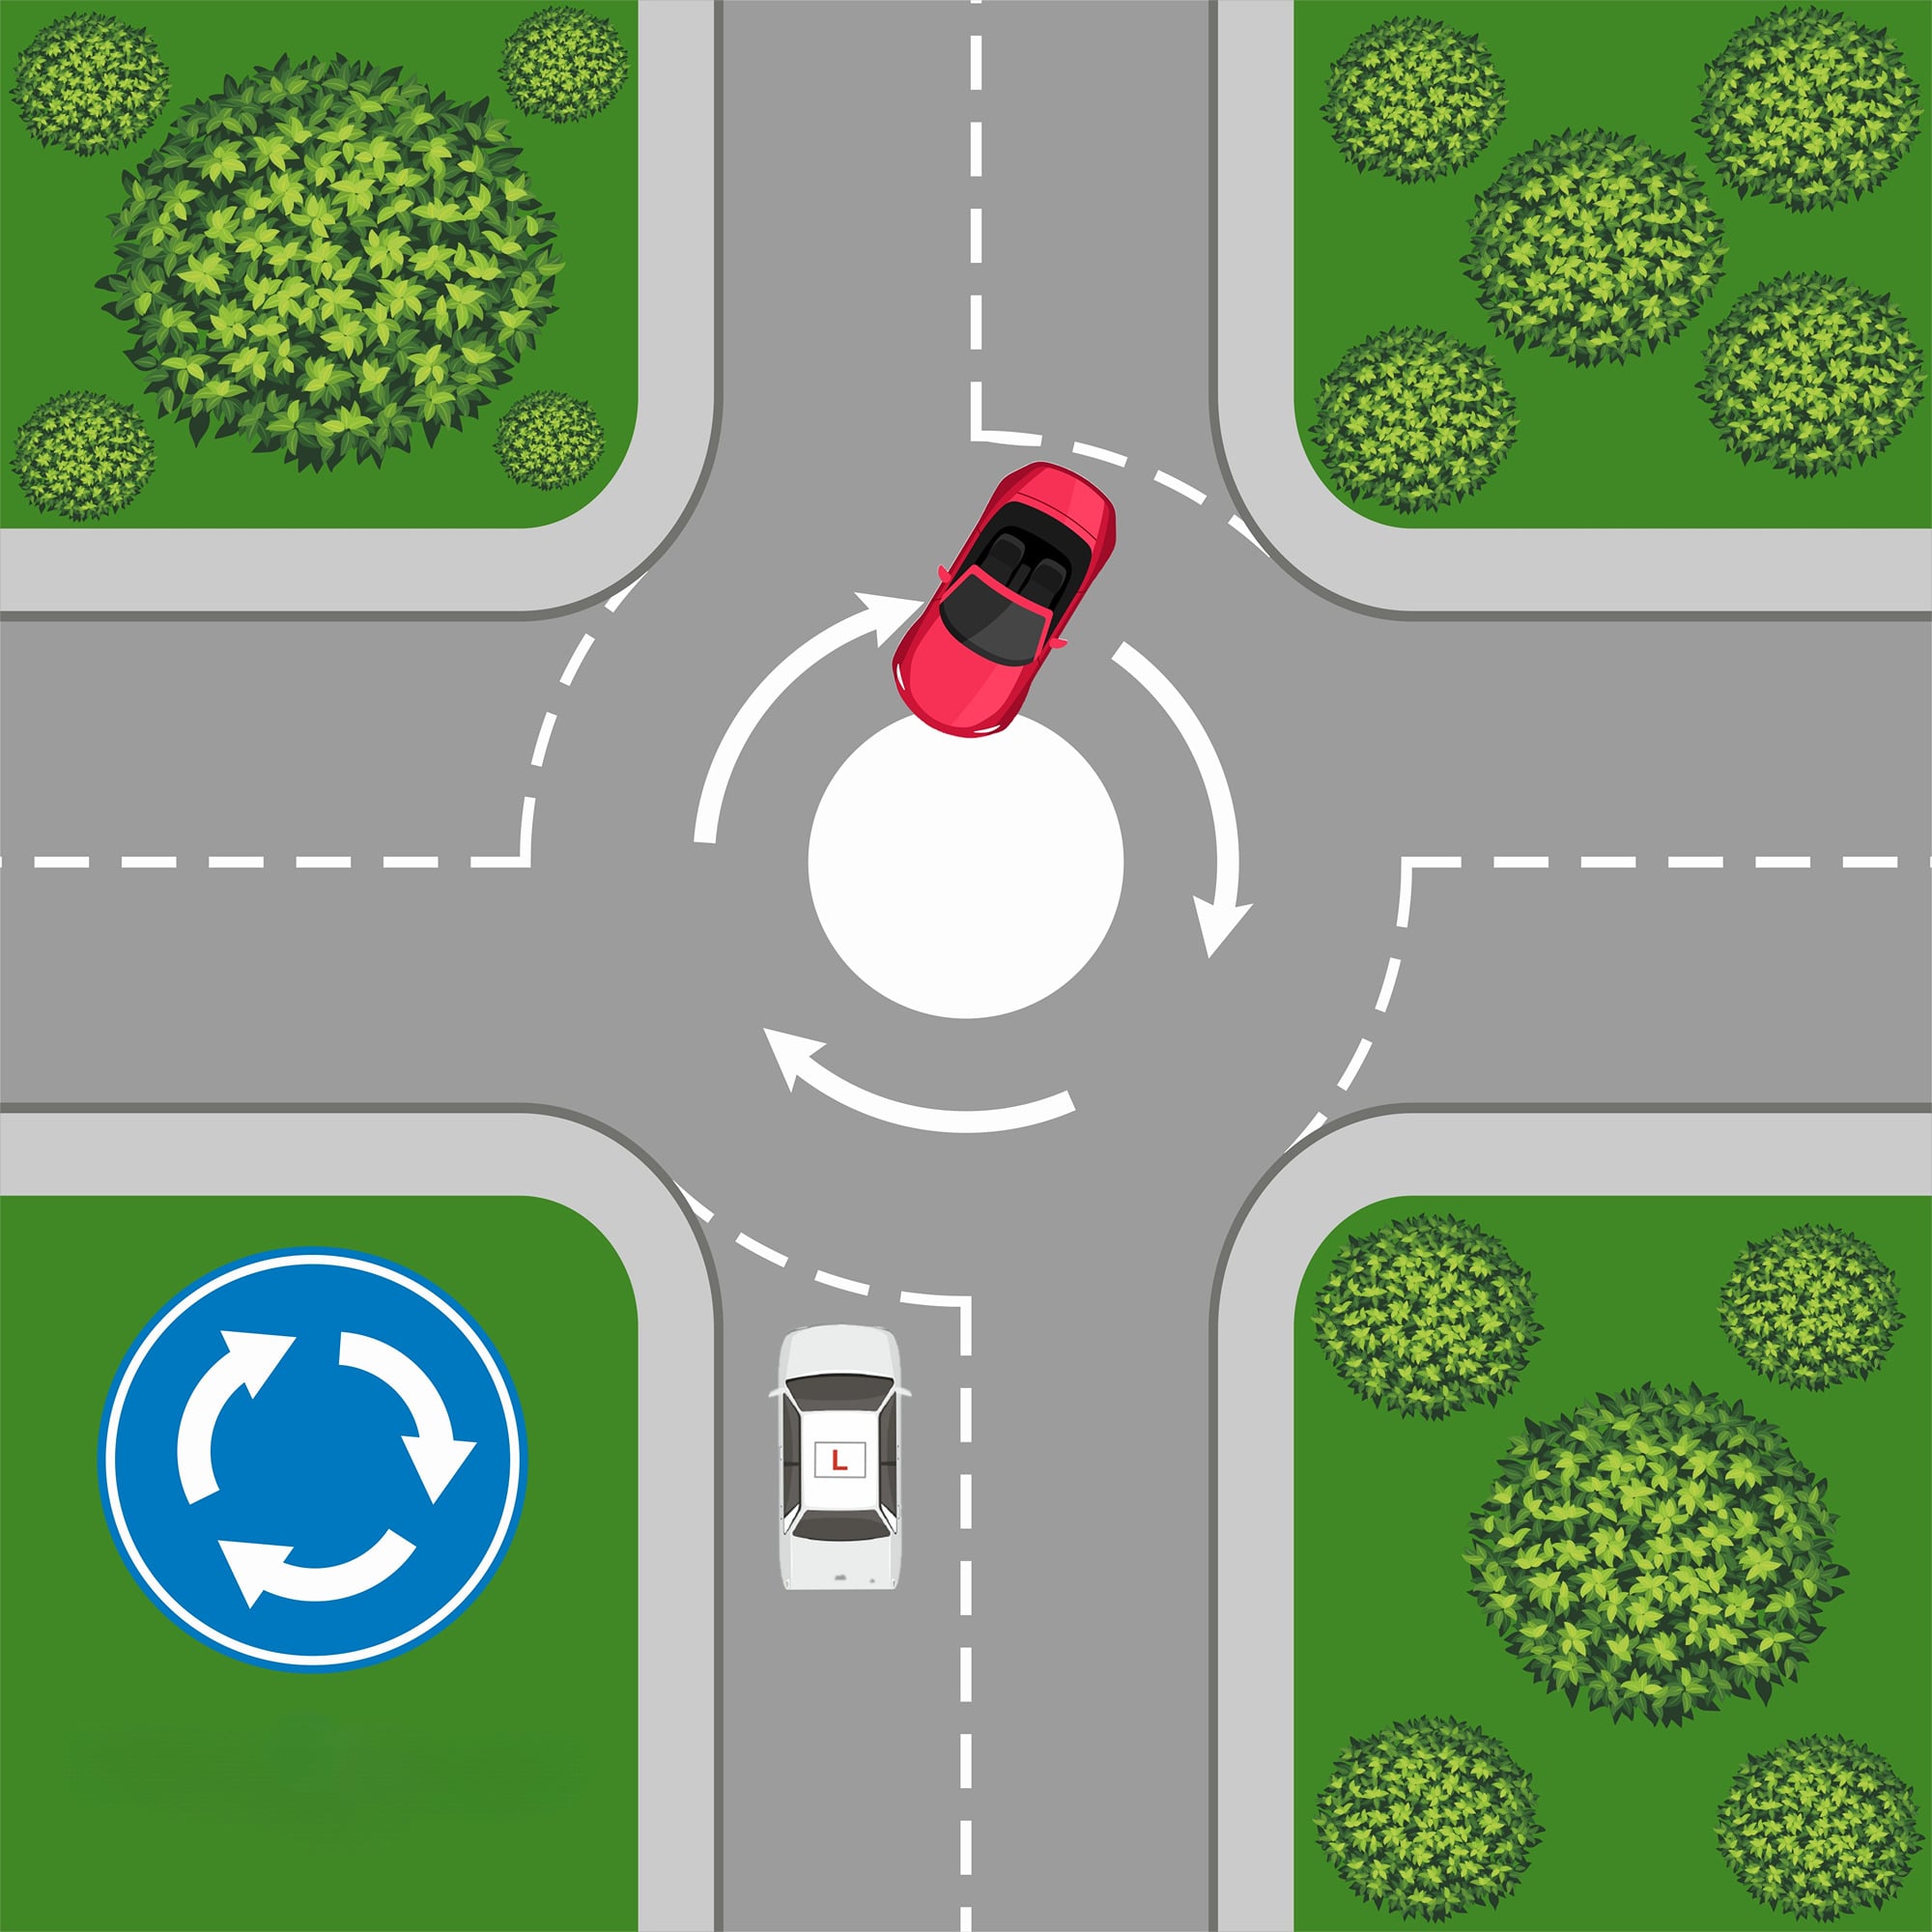
Why “Vehicle First, Road Second” Matters on Mini Roundabouts
Mini roundabouts don’t behave like the textbook—and neither do the drivers using them. That’s exactly why we teach vehicle first, road second.
If you rely on the road layout, you’re assuming drivers will follow a neat, circular path. On mini roundabouts, that assumption is often wrong.
Why mini Roundabouts are different
What actually happens in the real world
1. Turning before the roundabout
Oncoming vehicles may start turning before they even reach the centre.
To a learner, it can look like: “They’re going straight…”
But suddenly: They turn across your path early.
2. Missing the roundabout completely
Some drivers treat mini roundabouts like a crossroads.
They don’t slow properly
They don’t follow the curve
They effectively ignore the roundabout
This makes their path unpredictable.
They are aRoundabouts not an Overabout
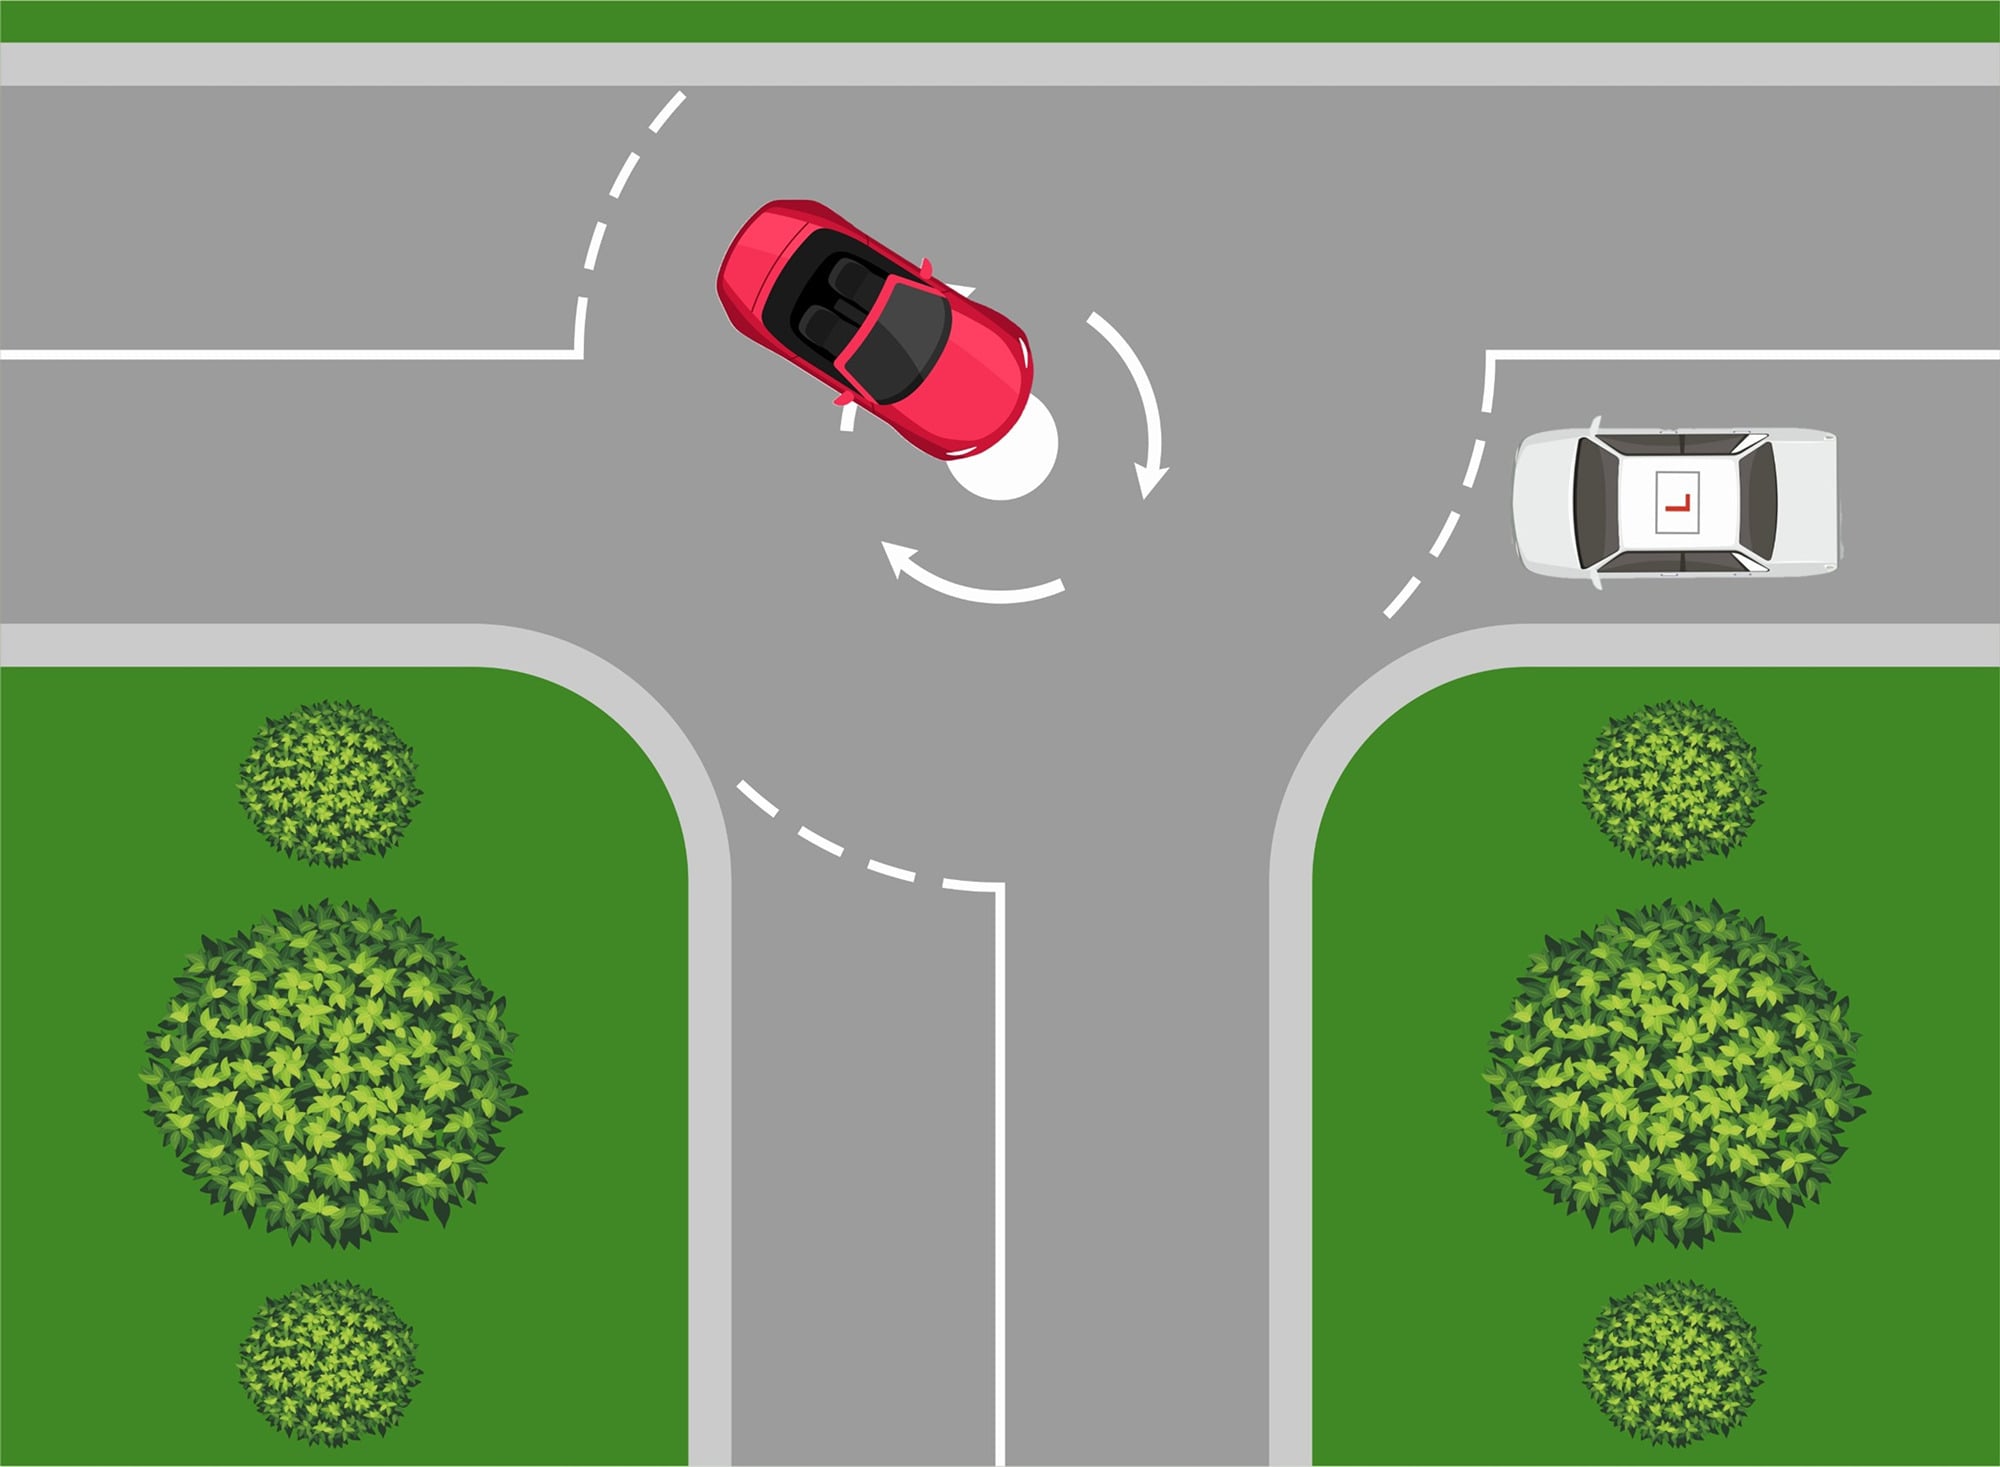
3. Driving over the top
Because the centre is just paint, or bricks, many drivers:
Drive straight over it
Cut across the middle
So instead of a curved path, you get a straight-line movement
4. Turning late
Some drivers approach as if going straight… then turn at the last moment. This creates:
Sudden changes
Late decisions
Reduced reaction time for you
The signal gives a guide not a decision
5. No signal (or wrong signal)
The signal can be a guide of what the car is planning to do - For instance turn right, but it doesn't ley you know where they are going to turn or when
Indicators are often:
Late
Missing
Incorrect
So if you rely on them: You’re guessing, not reading the situation.
Mini Roundabouts Read the vehicle
What this means for your pupil
All of this leads to one simple truth:
You cannot rely on the road layout to tell you what will happen.
Instead, you must watch:
What the vehicle is doing
How it’s moving
What it’s likely to do next
Instead of thinking:
“It’s a roundabout, so they’ll go around…”
Think: “What is that car actually doing?”
Mini Roundabout Identification
Identification (Lesson Planning Starts Early)
Strong teaching begins before the junction.
Teach pupils to identify a mini roundabout by:
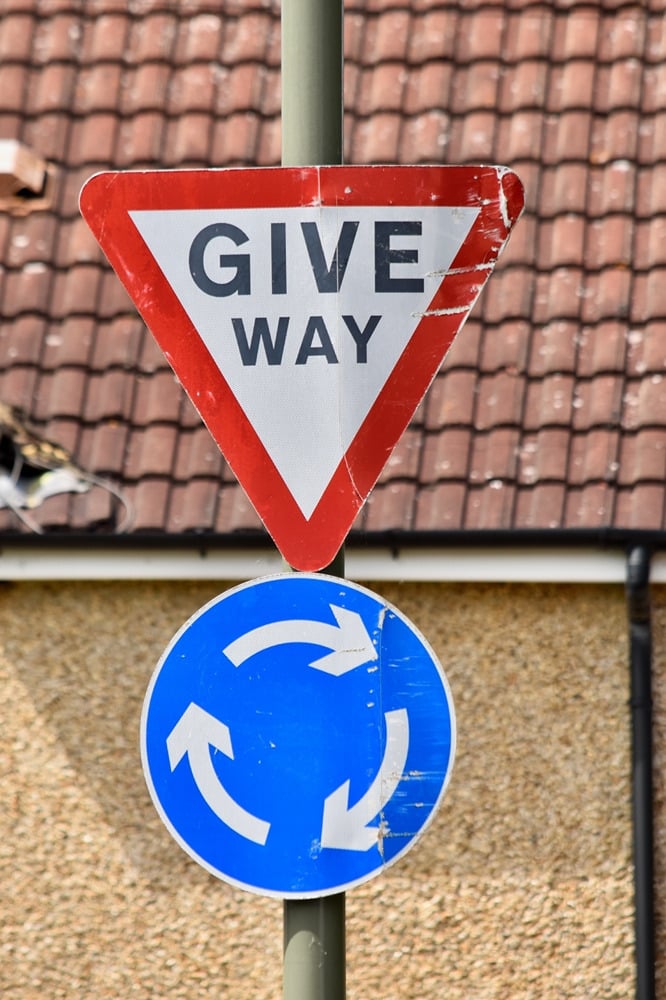
The blue circular roundabout sign
The white painted circle on the road
Give way lines on approach
The overall junction layout
Coaching question:
“What tells you this is a roundabout before you arrive?”
Early identification leads to earlier planning—and safer decisions.
Mini Roundabout - Open or Closed
Open or Closed Junction
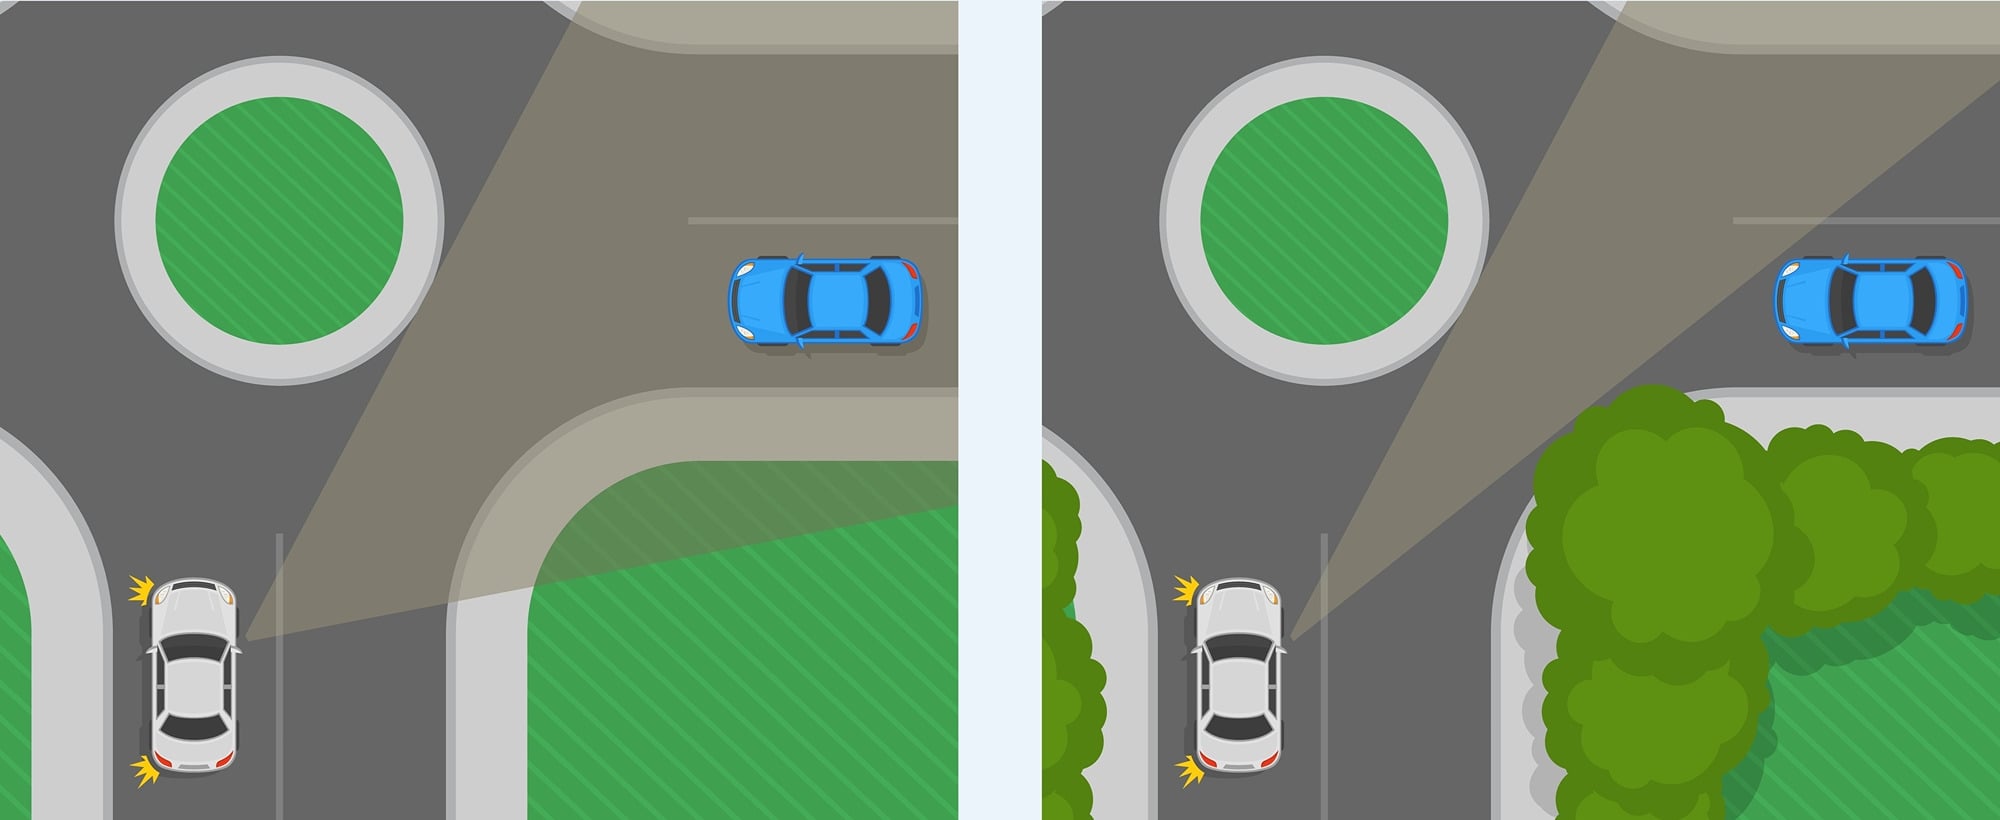
Mini roundabouts are often more closed.
That means:
Visibility may be restricted by buildings, parked cars, hedges
Traffic from the right is closer
Traffic ahead is closer
This is critical for risk management.
Mini Roundabout - Position
Position of the Roundabout (Affects Speed and Control)
The position of the mini roundabout changes how you approach it.
If it is slightly offset:
Less steering required
Smoother path
Slightly more flow
If it is directly in front:
More steering required
More control needed
Slower speed essential
Simple rule:
More steering = less speed
This helps pupils understand why they need to adjust—not just what to do.


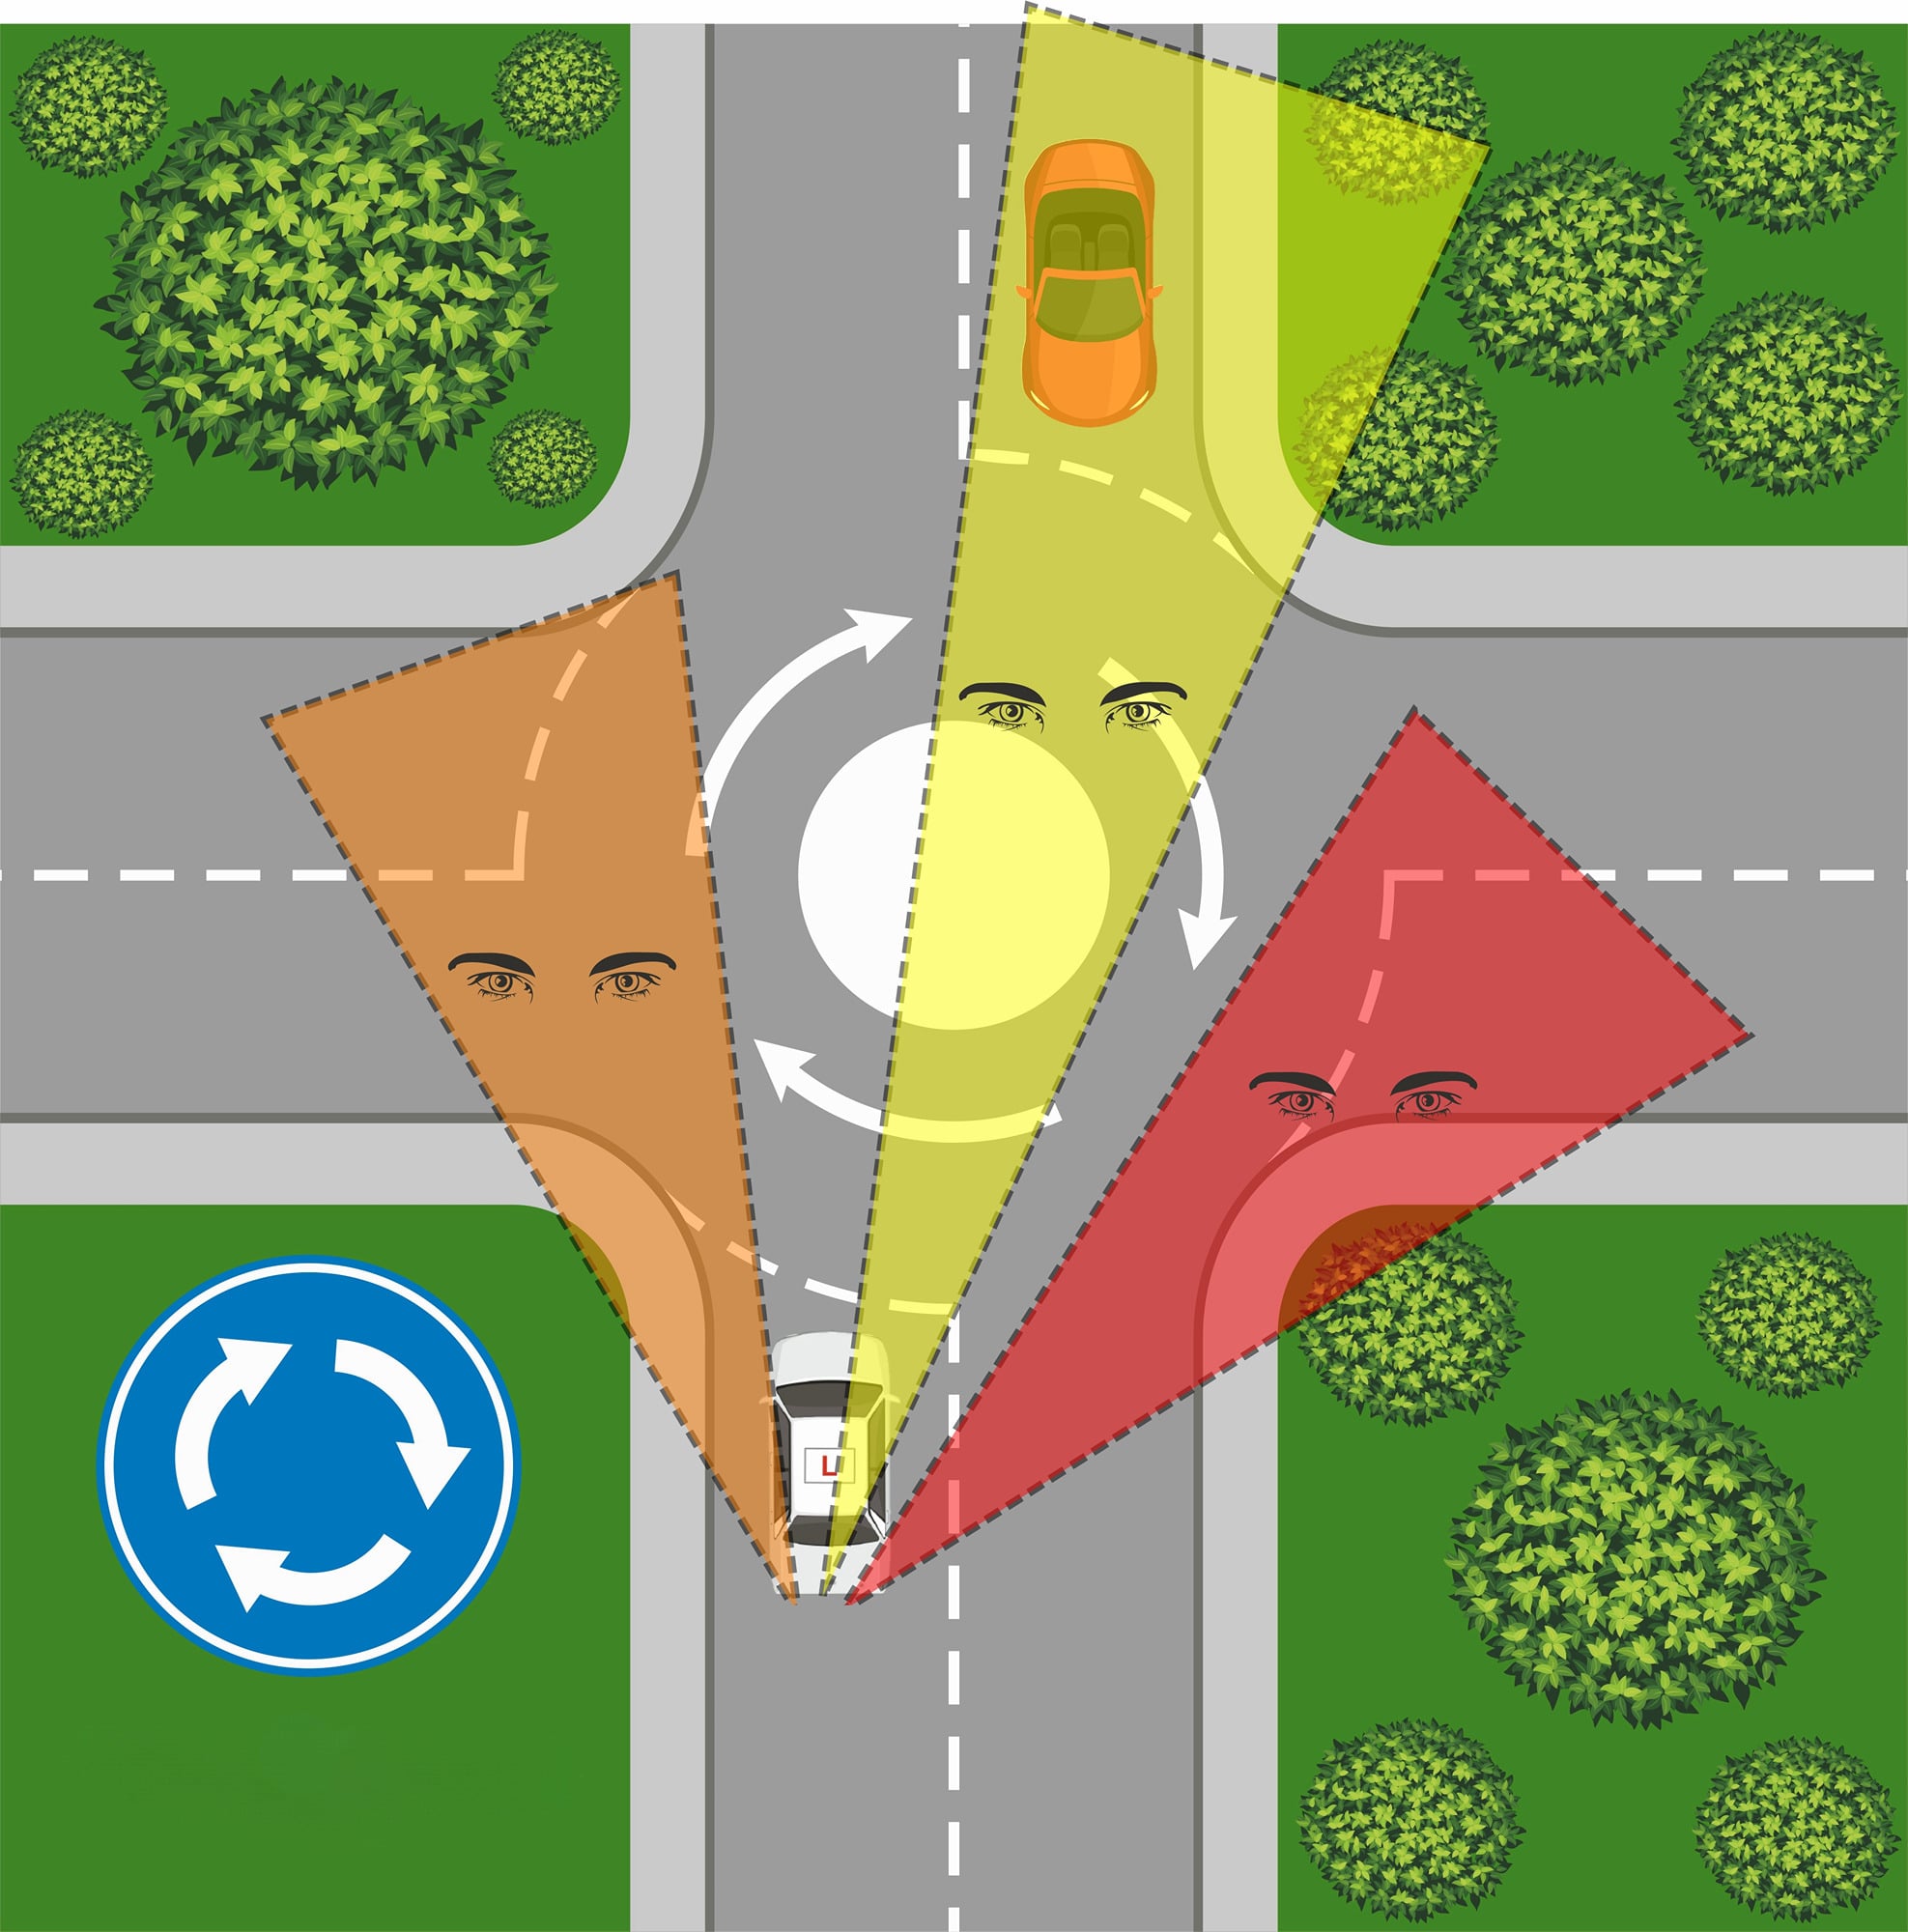
Mini Roundabout Observations
Observations (More Important Than Ever)
Observation at mini roundabouts must be continuous and structured.
Right → Ahead → Left → Ahead → Right
Why this matters more here:
The view is often restricted
Traffic appears later and closer
Situations change quickly
“What you saw a second ago may not be true now.”
Common fault:
Look once → go
Correct approach:
Keep checking until you move
Mini Roundabout - Car first, Road Second
Car First, Road Second (The Most Important Concept)
This is where strong teaching stands out.
Instead of:
Driving the layout
Reading the vehicle Why?
Because on mini roundabouts:
Cars turn early
Cars turn late
Cars drive straight over
Cars don’t signal
Cars behave unpredictably
So the road layout cannot be trusted on its own.


MSPSGL
MSPSGL (Keep It Traditional, Apply It Properly)
The routine remains the same:
Mirrors
Signal
Position
Speed
Gear
Look
But the key difference is in speed and look:
Speed must allow you to stop comfortably
Observations must be more frequent and deliberate
Mini Roundabout - Large Vehicles
Larger Vehicles (Increased Risk)
Larger vehicles such as:
Buses
Lorries
Vans
Need more space.
They may:
Drive over the centre
Cut across lanes
Enter your space earlier
Swing wide
“Expect larger vehicles to behave differently.”
Big vehicle = big space needed
Two Lane Mini Roundabouts
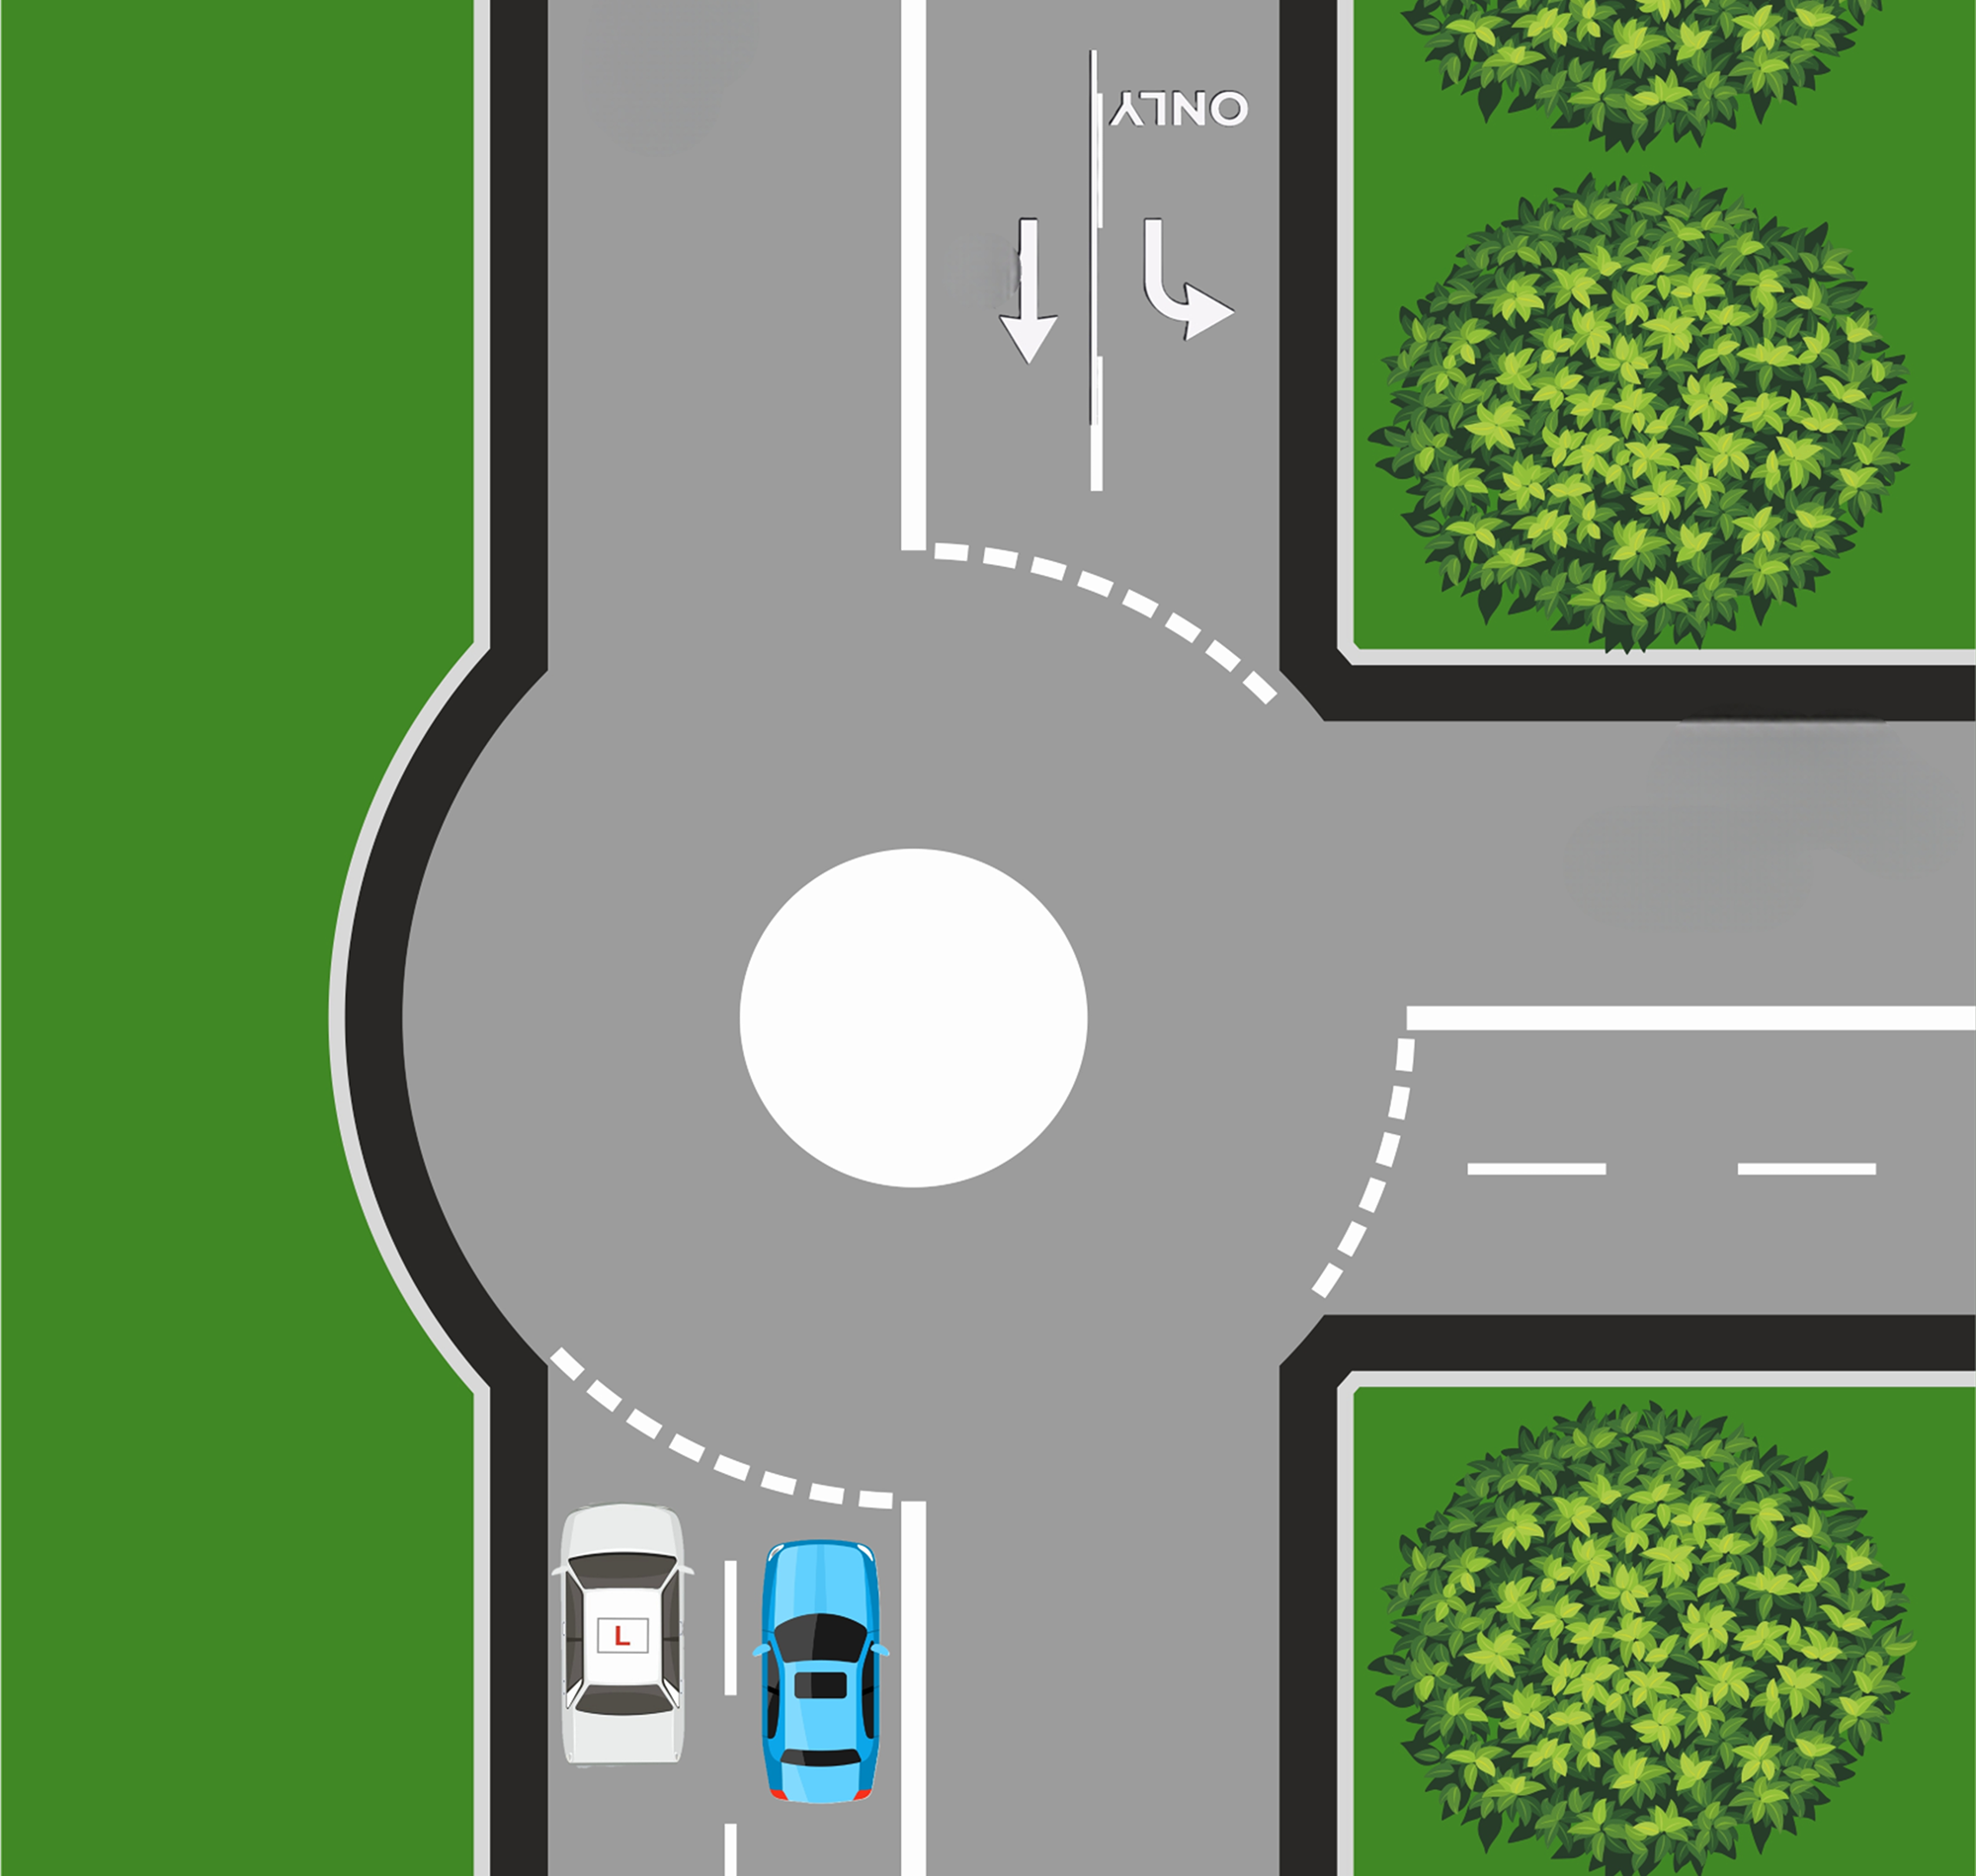
Two-Lane Mini Roundabouts (Lane Discipline + Awareness)
Some mini roundabouts have:
Two lanes on approach
Direction arrows
Teach:
Follow your lane
Use road markings
But also:
Expect others not to follow them
Be ready for lane drifting or cutting across
“Stay in your lane — but don’t trust others to.”